Garage Door Internal Spring Adjustment

Torquemaster Garage Door Spring Fix Youtube

Garage Door Spring Replacement Wayne Dalton Torquemaster One Youtube
Should I Get A Torsion Spring System Or Torquemaster Springs System

Installing And Adjusting Garage Door Torsion Springs Garage Door Torsion Spring Garage Door Adjustment Garage Door Springs

Wayne Dalton Torquemaster Garage Door Spring Replacement Youtube

Garage Door Torsion Spring Replacement Costs Check More At Http Talie Pw Garage Garage Door Springs Garage Door Spring Adjustment Garage Door Torsion Spring
This can make the other parts of the garage door last a much longer time.
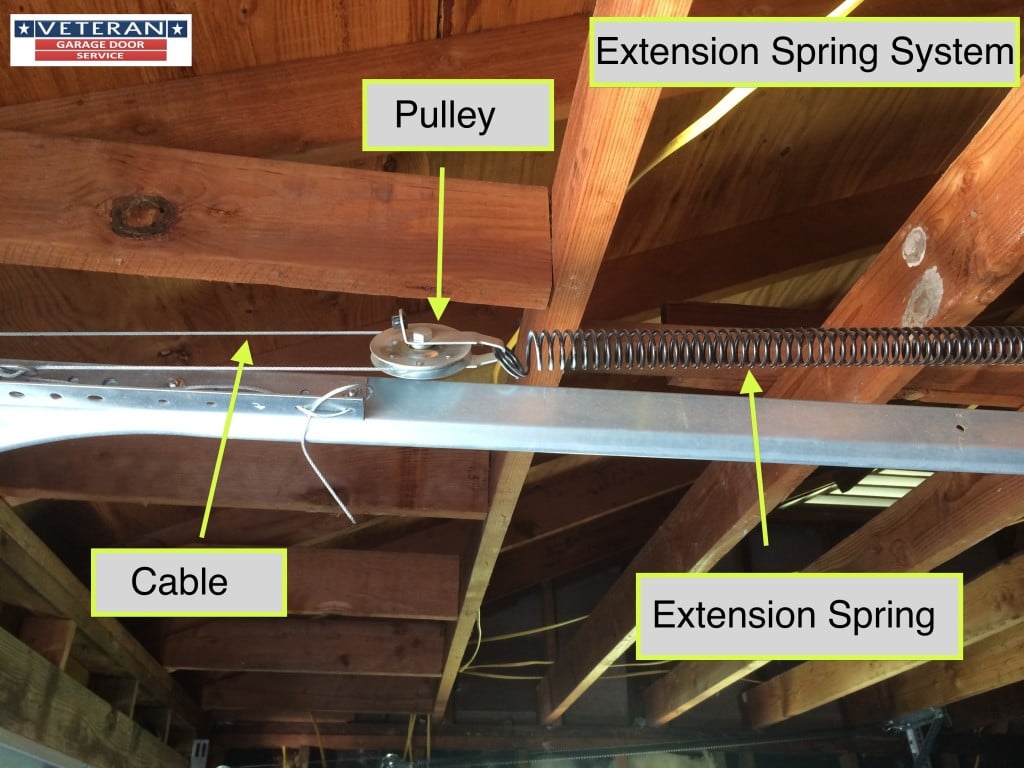
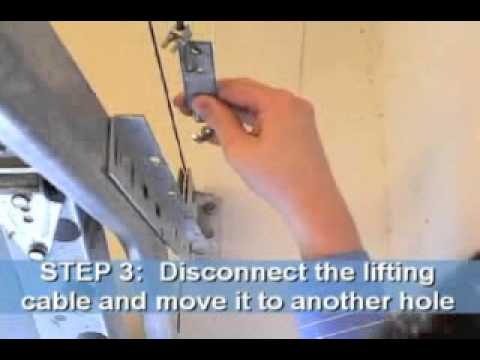
Garage door internal spring adjustment. Adjust the spring into the proper position and make sure your garage door closes all of the way. To adjust your garage door s side mounted springs first open your door fully and secure it in place with a c clamp below the bottom roller. Start by removing the locking pin photo 1. If it was opening too quickly move it to the next lower hole.
The rod will need to be at least 18 inches long and 1 2. If the door was closing too quickly move the spring to the next higher hole on the bracket. Adjust the springs on both sides of the door the same way. Once the spring is free of tension remove from its track hanger.
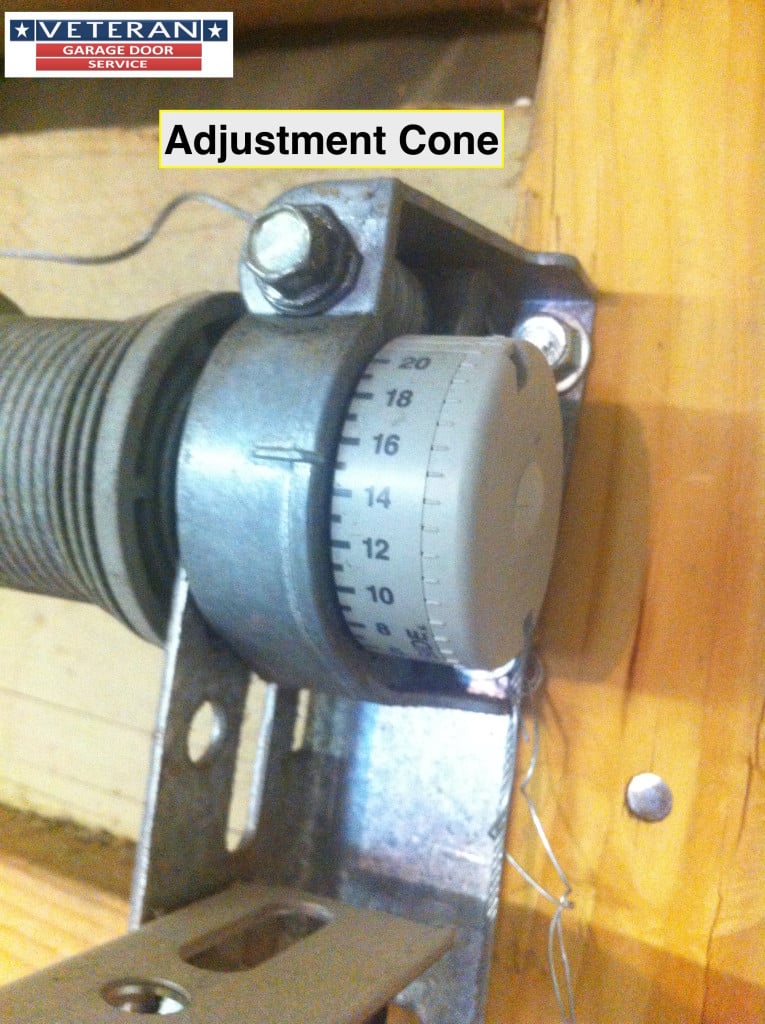
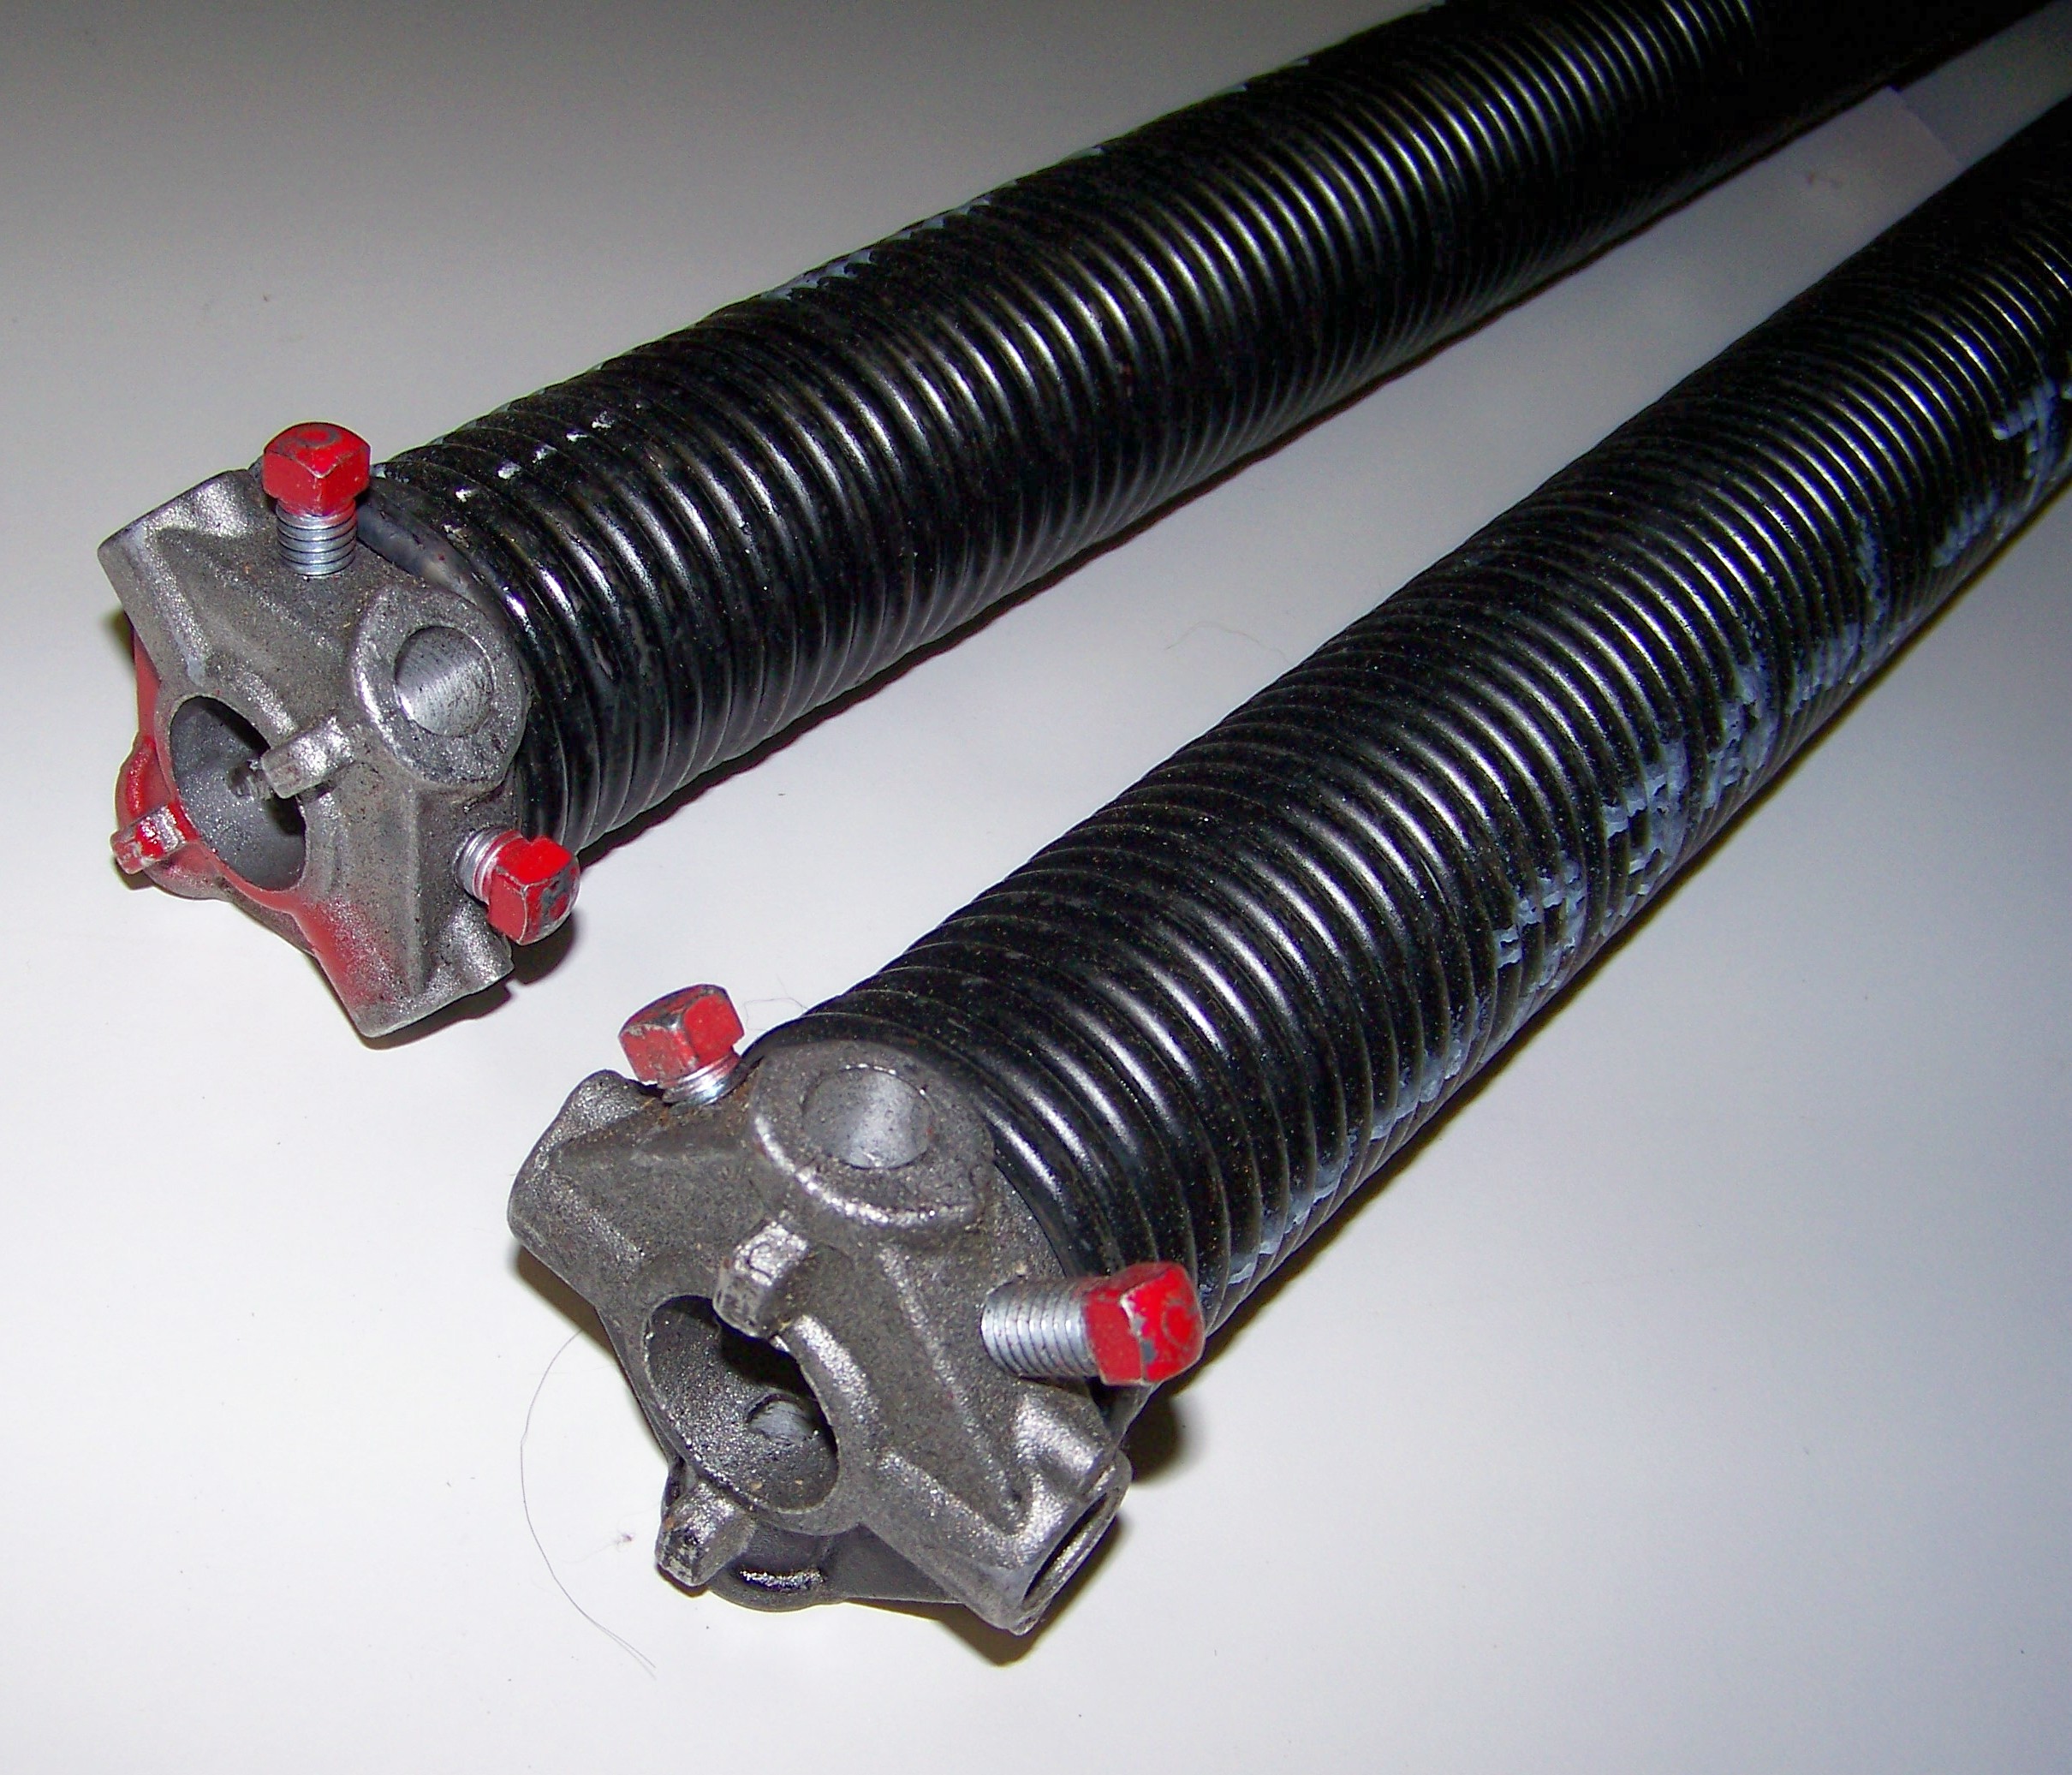
The cone is on the torsion spring on the left side away from the. If the self closing door to your garage isn t closing hard enough to latch properly or the door slams shut you can adjust the spring hinge tension with a hex wrench and pliers. Detach the old spring from both ends and replace it with the new one and replace the pulleys as well if they are worn out. How to adjust a torsion spring garage door step 1.
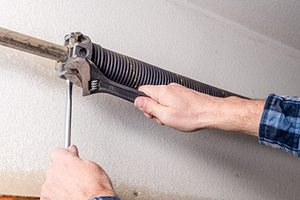
Use a metal rod to stick in the first notch of the cone. Retest the door. How to safely adjust your garage door spring. One end of the spring is connected to the garage door track or frame.
Look for a reddish cone on the torsion spring. The other is attached to a pulley connected to the cable.

Wayne Dalton Torque Master Vs Torsion Spring Setup

Garage Door Spring Adjustment Garage Door Springs Garage Door Spring Replacement Garage Door Spring Adjustment
How To Replace A Garage Door Spring Hunker

Garage Door Spring Safety Garage Door Torsion Spring Garage Door Springs Garage Doors
My Garage Door Spring Broke What Should I Do

One Piece Garage Door Adjustment Garage Door Adjustment Garage Spring Garage Doors

What To Do When Your Garage Door Springs Go Bad
How To Fix Garage Door Tension Youtube

Roll Up Doors Direct Installation Guide And Procedures

Ddm Tech Tips How To Adjust The Spring Tension On Torquemaster One Torsion Springs Youtube

Brano Garage Door Springs Roll Up Springs Garage Door Springs Garage Doors Garage Door Hardware

Installing A Garage Door Part 4 Tensioning The Ez Set Torsion Spring Garage Door Springs Garage Door Parts Roll Up Garage Door
How To Replace Garage Door Torsion Springs Youtube
2020 Garage Door Spring Replacement Or Repair Costs Homeadvisor
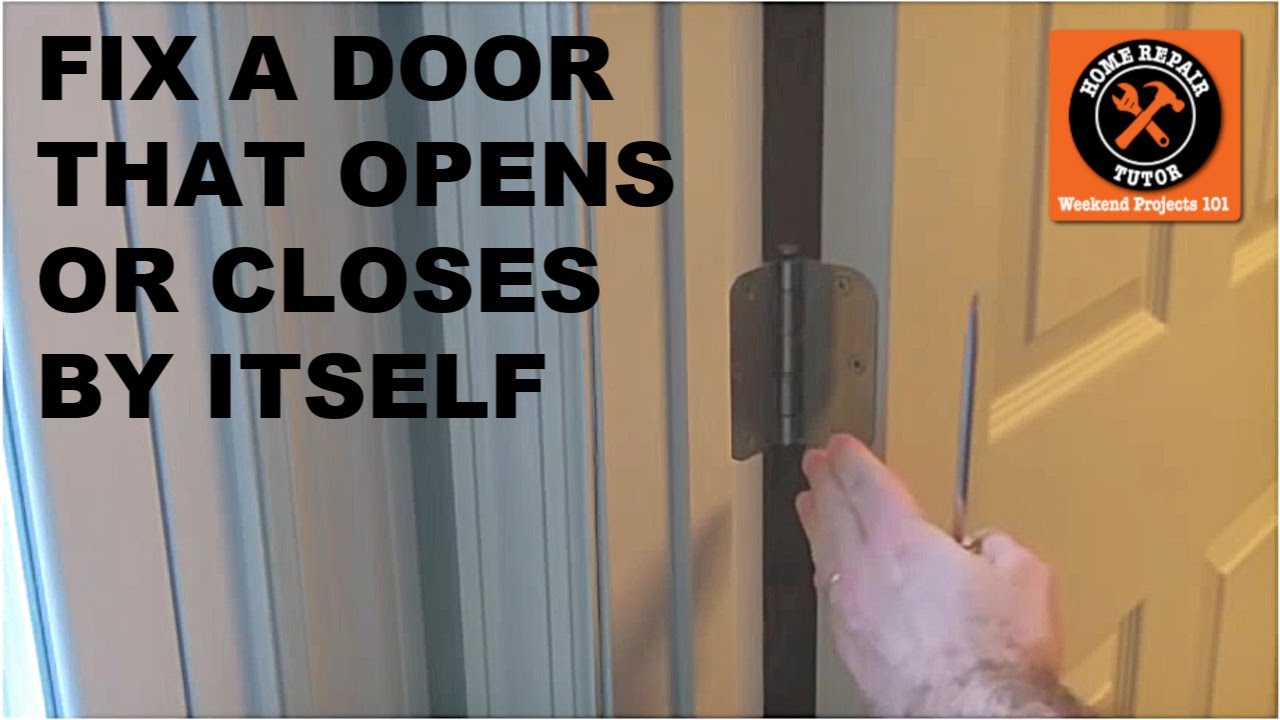
Fix A Door That Closes Or Opens By Itself Youtube

How To Adjust A Door Closer Door Closing Speed Force

How To Replace Torquemaster One Springs Youtube

Understanding The Garage Door Spring Color Code And Ensuring You Pick The Right Size
Https Encrypted Tbn0 Gstatic Com Images Q Tbn 3aand9gcqr5qve3bznuvgkilpoz0tgs Enwfiecho5w6hxtj0wfkjwaf7x Usqp Cau

Tighten Garage Door Cable On Drum Garage Door Spring Repair Garage Door Spring Replacement Garage Door Springs

Important Parts To Adjust From Your Garage Door Opener System

Garage Door Repair Service And Spring Replacement In Virginia
How To Adjust An Uneven Garage Door The Home Depot

Garage Door Spring Repair Houston Contact At 832 454 3432 Or Visit Http Ezohd Com Garage Doors Garage Door Hinges Garage Door Spring Repair
Garage Door Repair In Southeast Florida Broten Garage Door Sales
Id372r2 Garage Door Opener W Rf Light Kit Transceiver User Manual 297368 Wayne Dalton
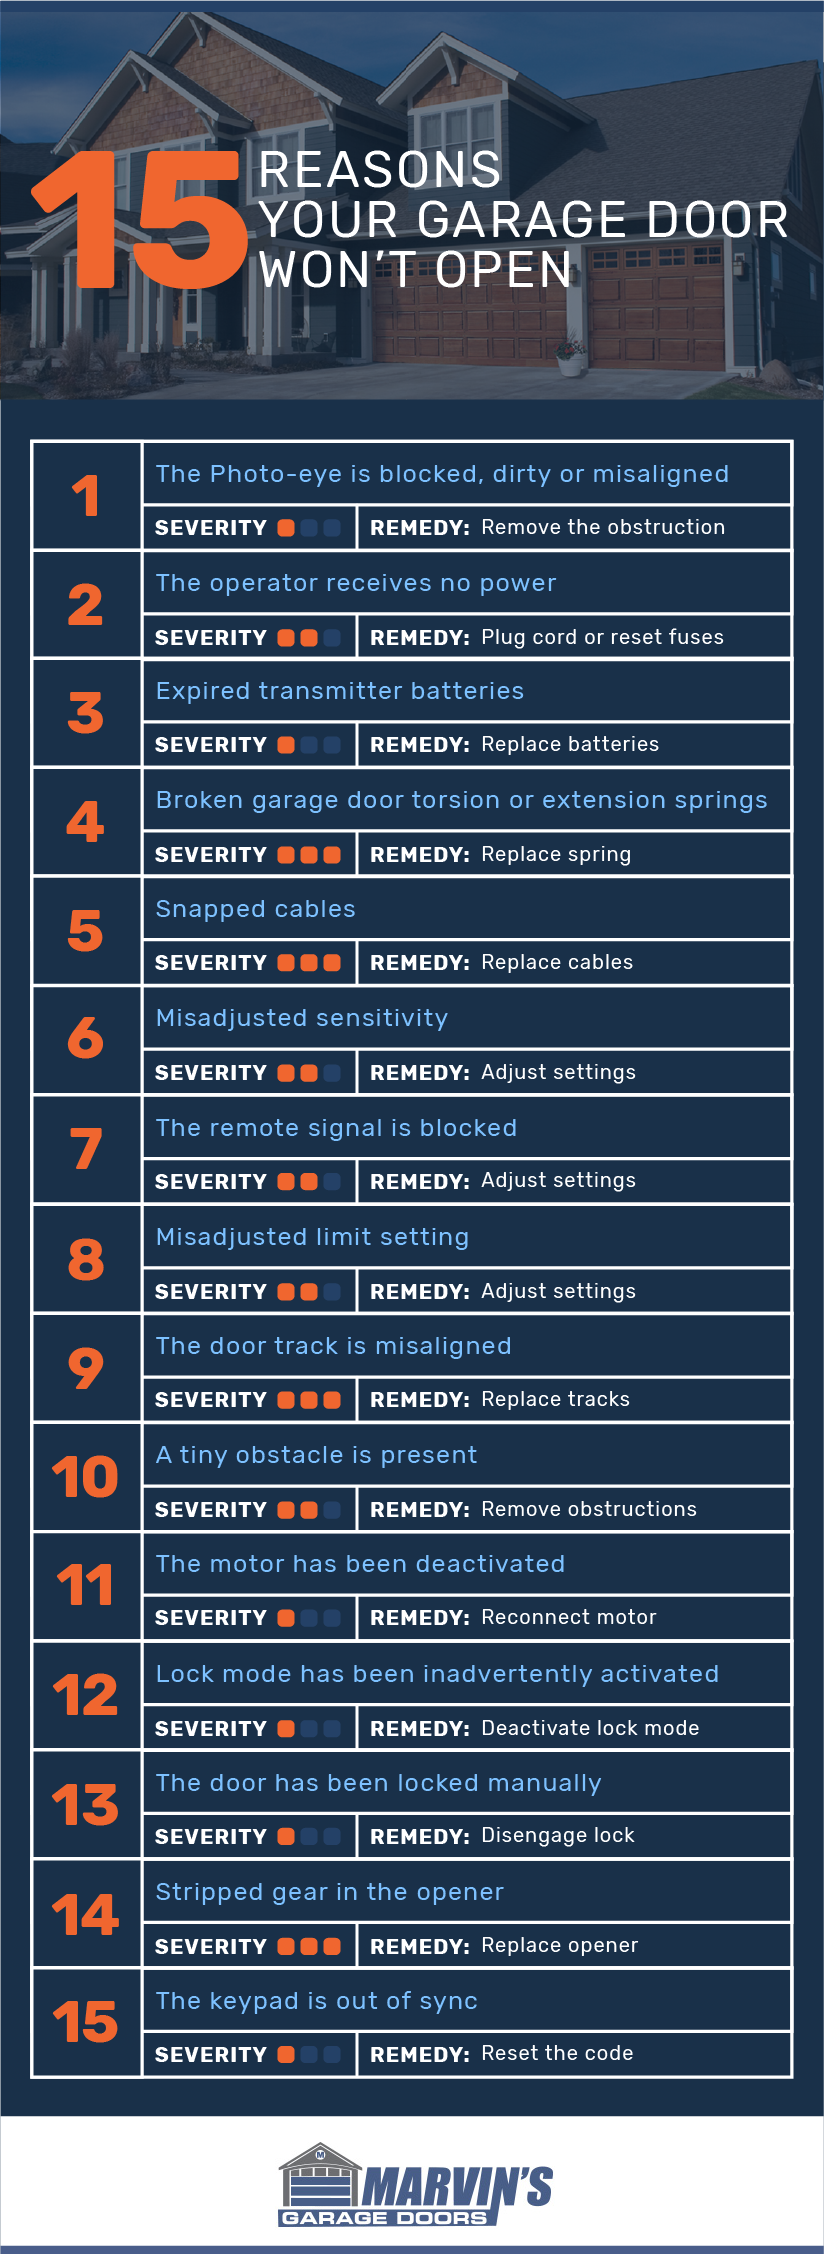
15 Reasons Why Your Garage Door Won T Open Or Close

Tilt A Door Garage Doors Prices Check More At Https Perfectsolution Design Tilt A Door Garage Doors Prices Garage Doors Doors Garage

Garage Door Repairs Services A A Garage Doors Garage Door Parts Sectional Garage Doors Garage Door Springs

With Any Decision Any Adjustment Will Certainly Improve The Look Of Your Home However There Is One Kind Of Garage Door Design Garage Doors Garage Door Types

Garage Door Torsion Spring Repair Garage Door Design Garage Door Springs Garage Door Torsion Spring
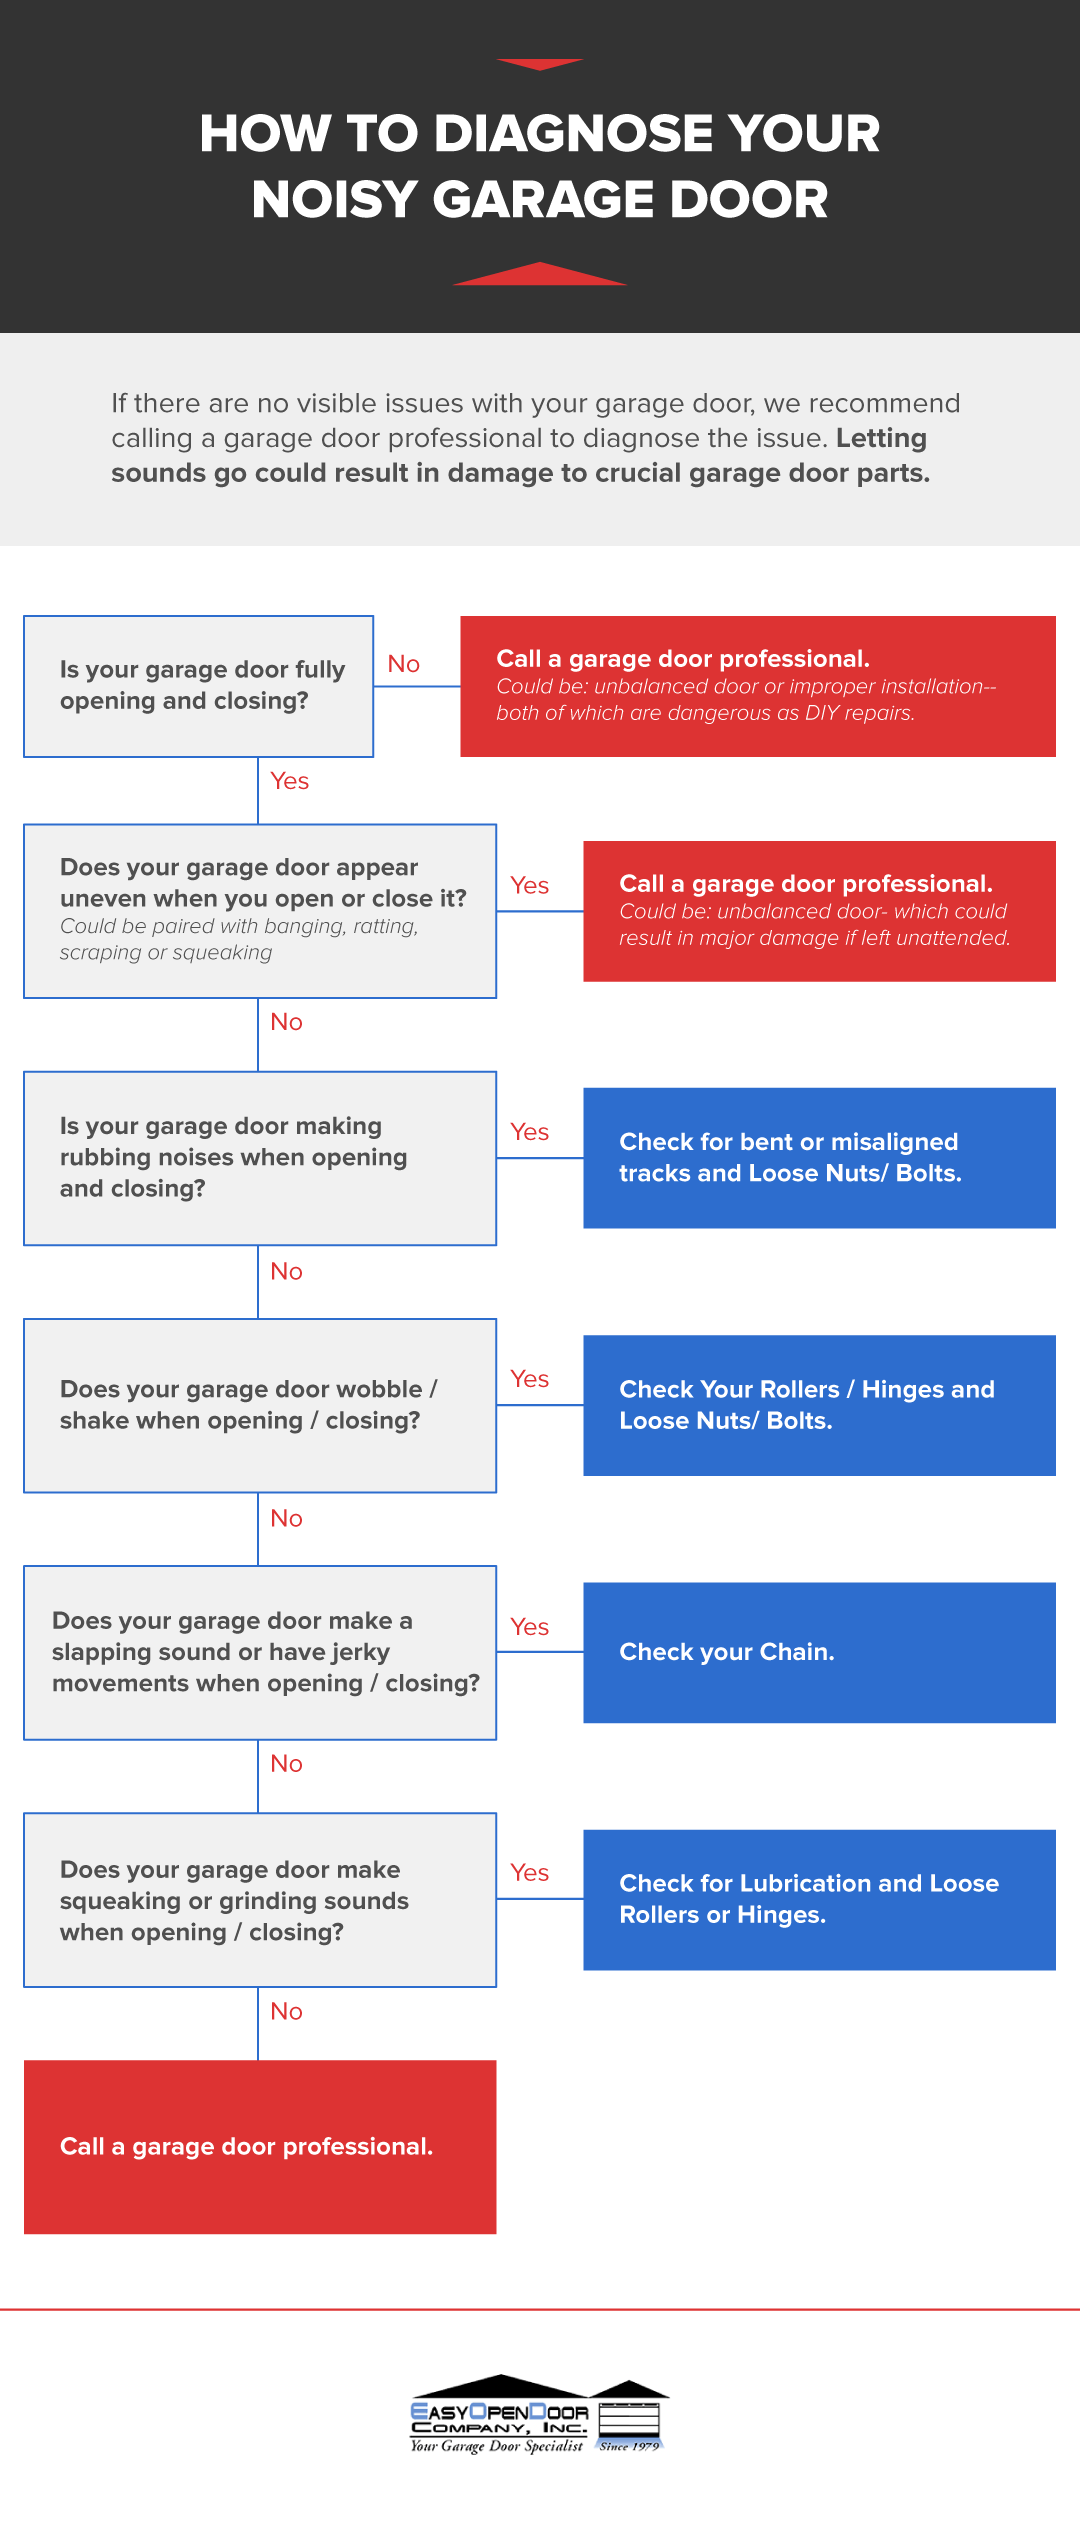
Garage Door Making Noises Troubleshoot Fix A Noisy Garage Door

Wayne Dalton Torquemaster Plus Tm3 Winding Assembly Tool 308963 Nib W Instruct Wayne Dalton Wayne Dalton

How To Fit And Renew A Door Handle Spring Itstherepairman Door Handle Tutorial Youtube

Coppa Woodworking Wood Screen Doors And Wood Storm Doors Half Surface Spring Hinges Screen Door Screen Door Hinges Wood Screen Door
315390r3 Garage Door Remote Control Receiver User Manual The Genie A Division Of Overhead Door

Pin On Garage Door

How To Repair A Garage Door In 2020 Garage Door Panels Garage Door Maintenance Garage Door Track

Spring Loaded Hinges Buyers Guide And 7 Top Self Closing Hinges The Home Woodworker

Internal Oak French October 28 2018 At 10 14am With Images Screen Door Repair French Doors With Screens Retractable Screen Door

Automatic Rolling Shutter Repair Service Bangalore Areas In 2020 Rolling Shutter Shutter Repair Shutters

How To Adjust A Self Closing Door Hinge Youtube

